FFXIV Delubrum Reginae | A Quick Guide to Your Run
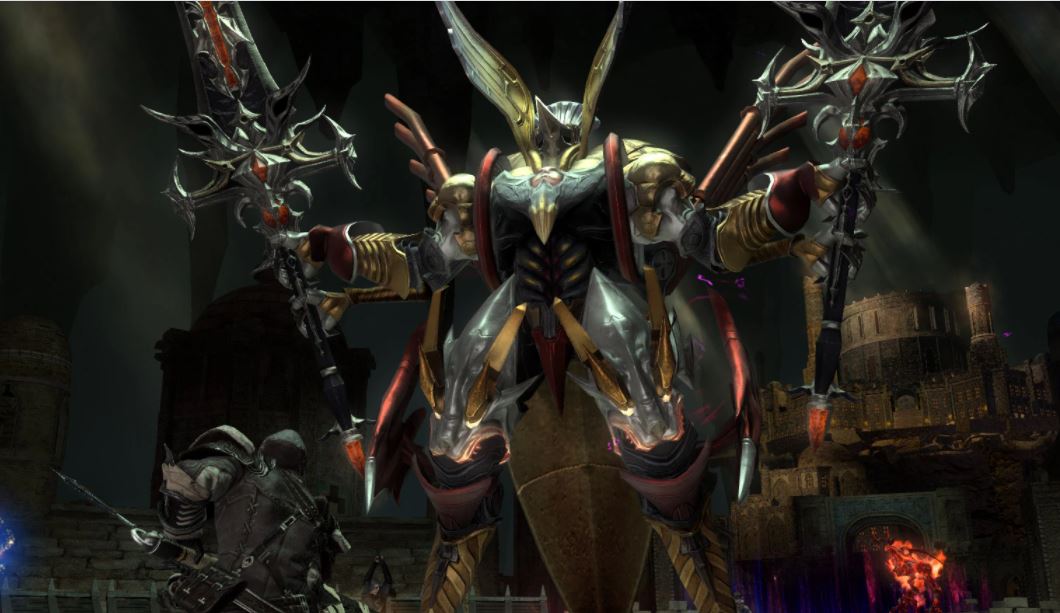
The newest dungeon, Delirium Reginae, is quite a strong 24 man raid. This guide involves the Normal mode run, where you are allowed to raise and recover during your run. You’re going to have to be careful about getting hit more than once in this raid, so knowing your basics will help alleviate a little bit of frustration from your encounter. We hope this FFXIV Delubrum Reginae guide will help you make a good first impression and understand the fights better!

Table of Contents
FFXIV Delubrum Reginae
This battle involves 4 major bosses with important mechanics and 2 minor bosses to build up resources.
Trinity Seeker
If you’ve played Heavensward Primal, you might be used to this boss. It has three different weapons, and the stances determine what it might cast when using Verdant Path.
- Merciful Air: The Katana, with a blue graphic. Has one in each hand.
- Baleful Air: Large greatswords, two of them.
- Iron Air: No weapons, just has fists.
Merciful Air 1: When using his Katanas, he will slash four times. First Mercy is front-right Katana, Second Mercy is back-right Katana, Third Mercy is back-left Katana, Fourth Mercy is front-left Katana. After it casts the four Mercies, it will do them quickly in the same order. You will be dealing with half-raid wide cleaves, so pay attention! You might have to run through the boss to avoid the areas.
Baleful Air 1: Baleful Swathe covers the left and right side of the arena, leaving a skinny rectangle from north to south safe. Be within the radius of his target circle. Baleful Blade requires you to take cover behind the barricades available in the arena. If it uses Phantom Edge, then you must go in front of the barricades for the next cast of Baleful Blade; this is because otherwise, the area of effect will push you into the death wall. Try to be closer to the middle of the arena.
Iron Air 1: Stack for Iron Impact. Iron Splitter detonates specific rings of the arena, based on what ring color that the hand is on; dirt or stone.
Merciful Air 2: Act of Mercy strikes in the 4 cardinal directions. Then it uses Seasons of Mercy; this spawns a criss cross of ice paths, a orb with a Gaze Attack, and a flower that becomes an AoE Merciful Blooms. Head to the side of the moon orb but face away, dodge away from the ice paths, and be far from the Merciful Blooms.
Baleful Air 2: Baleful Swathe as normal, but make sure you’re going to be caught on a Barricade, because this Baleful Blade has Phantom Edge. Gather mid first, and then head back behind the barriers for the Baleful Blade. You’ll want to break the Burning Chains during the Baleful Blade cast.
Iron Air 2: Stack for Iron Impact. Then, three players should be targeted for Dead Iron. Make sure, if you’re targeted, that you spread out from the core of the raid. Try to have them spread out on the left, right, and back of the boss to avoid hitting the party. Be prepared for the Iron Splitter afterwards.
Dahu
This guy has two left-and-right shockwaves. When you get staggered, avoid the Firebreathe 90 degree AoE. Avoid the Marchosias that spawn in the arena. You’ll want to position yourself to have the Dahu knock you out of their Hunter’s Claw AoE for the second rotation.
Then, spin around the Dahu in the direction of the boss’s tell, for the multiple firebreathes. Don’t be between the boss and the wall during Hot Charge. Remember, during Feral Howl, to be knocked back into safe spots; don’t get hit into the adds!
The Queen’s Guard
Start this fight by burning all four robots at once, for about 25 seconds. Then, each will jump in briefly to fight the raid alone.
Queen’s Knight: Sword Omen is run away from boss, Shield Omen means stay near the boss.
Queen’s Soldier: Take note of the Soldier’s Avatar clones that the boss tethers to during Secrets Revealed. The ones that were tethered have real attacks, while the others have safe AoEs to stand in. The second time it’s cast, the clones will jump around.
Queen’s Gunner: The Automatic Turrets have a target ring pointing to where the Turret’s Tour orb attack will fire. It will spawn two turrets, and then two more. Keep track of where the turrets are pointing and avoid those AoEs.
Queen’s Warrior: Bombslinger means avoid the bombs. For Above Board, stand near large bombs. This is because those bombs will drop away from you when the boss levitates. The second time, the bombs are tethered, causing the small bombs to drop while the large bombs detonate. Stand on the small bombs this time. Pay attention to whether or not the bombs have tethers.
Strongpoint Defense: The robots are casting their raidwides, protected by Aetherial Wards. Take note of which direction the directional parries are (the glowing shield). Taking these directional parries is not recommended. You may use Caster Level 3 LB, but you can only do this before the parries come out. Otherwise, you risk death.
Bozjan Phantom
After it finishes Weave Miasma, pay attention to the northern wall. Square means beam AoE, don’t stand in it. Ring means Swirling Miasma, so stand in the safe circle and move with it. Then, it casts Summon; move to the phantasm to avoid the knockback. Vile Wave is a frontal cleave that you should avoid, but might be cast during Summon phases, so try to pay attention. Afterwards, Summon will knock you towards the wall; make sure you’re knocked back into the swirling miasma safe spots.
Trinity Avowed
Staff Phase: The major mechanic of this encounter is Hot and Cold. Avoid the Fury of Bozja AoE, then pay attention to your buffs:
- Intemperate: You’re good for now.
- Running Cold: -1 (one arrow down)
- Running Cold: -2 (two arrows down)
- Running Hot: +1 (one arrow up)
- Running Hot: +2 (two arrows up)
You must be hit by opposite temperature mechanics to restore you more towards neutral. She will spawn Freedom of Bozja soon, which creates four orbs of Blazing and Swirling orbs. Hug the middle.
Then, head to the orb that will restore your temperature closer to Normal. For example, if you have Running Cold: -1, head to Blazing Orb +1 on the temperature gauge.
Bow Phase: Don’t stand in the fire, and avoid the Flashvane’s massive arc around her by standing behind her. Use the Flame Arrow and Frost Arrow markers on the ground to restore your temperature.
Sword Phase: Infernal Slash makes you stand in front of her. Then, you must find the correct Blade of Entropy cleave to stand in, based on your temperature. Avoid it if it doesn’t bring your temperature up to Neutral. For Unseen Eye, avoid the AoEs by standing in the safe squares.
Staff Phase 2: Pay a bit more attention to the +2s that surround each orb. Then, avoid the clones yet again by standing in safe squares.
Bow Phase 2: Hide behind boss, avoid the clones and the fire of the AoEs after. Now, you must pay attention to the +2 cold and fire arrows.
At this point, the boss will rotate through her phases once again.
The Queen
Queen’s Will: Pay attention to the Queen’s Guard to see what direction they march. Their red dots will show how many tiles they march. Then, they’ll shoot cardinal beams in all cardinal directions. Try to count tiles and then avoid the cardinal direction accordingly.
Northswain Glow: Avoid the orbs that are intersecting, as that will spawn a large AoE circle. Stand on the other half of the arena. Stand in the middle tile to avoid Heaven’s Wrath knocking you into death walls.
Queen’s Will 2: Same as before. Pay attention to Judgement Blade; she raises her swords on the side that she plans to cut.
Queen’s Edict: Everyone gets debuffs. Movement Edict means you move that many squares, or suffer. Your Move means you move that many squares again. Make sure you don’t move too many squares!
Relentless Play: Queen’s Gunner and Queen’s Warrior spawn. Dodge turrets and watch where the bombs spawn. Heaven’s Wrath will knock you back, so make sure you get knocked back onto the safe bombs.
Queen’s Edict 2: Now, we’re combining Will and Edict. You have limited spaces to move to avoid the Robot’s Walk and Laser attacks. Try and figure out where the robots will end before starting your movement.
Relentless Play 2: Queen’s Knight and Soldier. Look at where the Clones are tethered, stand in the false AoE circles, then stand in the safe half of the arena for Judgement Blade. Then, go out for Queen’s Knight’s Sword, or in for the Shield.
Northswain Glow 2: This time, 3 lines will expand, detonating where they intersect. Now, you also need to avoid the marching of the robots. Pay attention to their movement counters, then run to a region safe from the Lines and the Robots.
Relentless Play 3: Gunner and Warrior. Dodge the turrets and get knocked back towards a small bomb. The third Queen’s Edict is just like the second, the Relentless Play is just like the second, then you get a Northswain Glow with the basic robots.
Follow this until she dies.
Nice job! We hope this guide is helpful, and please comment if there are any points of clarification that we missed that you think are important for new players to know!


![Is Stardew Valley Cross Platform? [SOLVED]](https://www.nerdsandscoundrels.com/wp-content/uploads/2020/03/is-stardew-valley-cross-platform-768x432.png)

